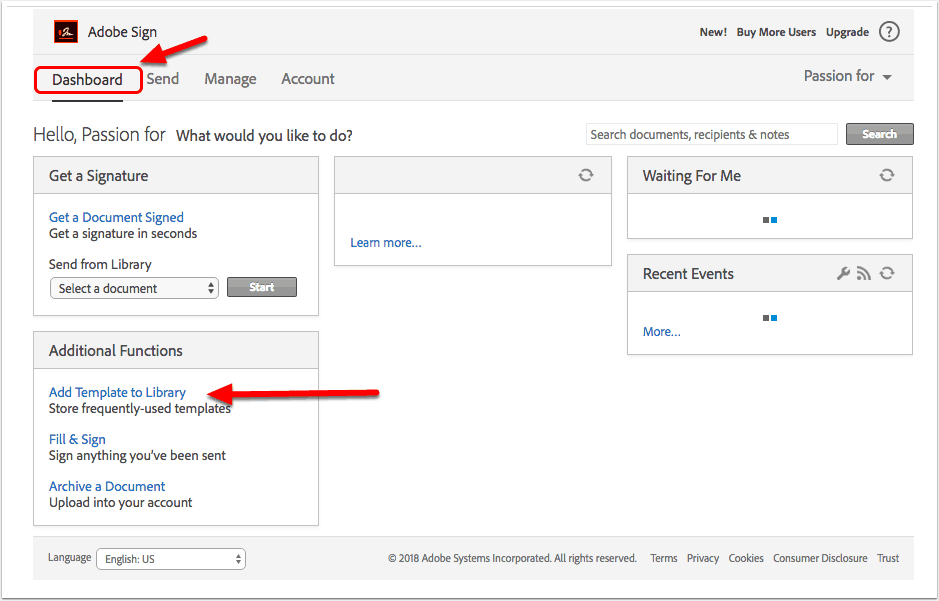
Log in to the dashboard
After logging in, select Add Template to Library.
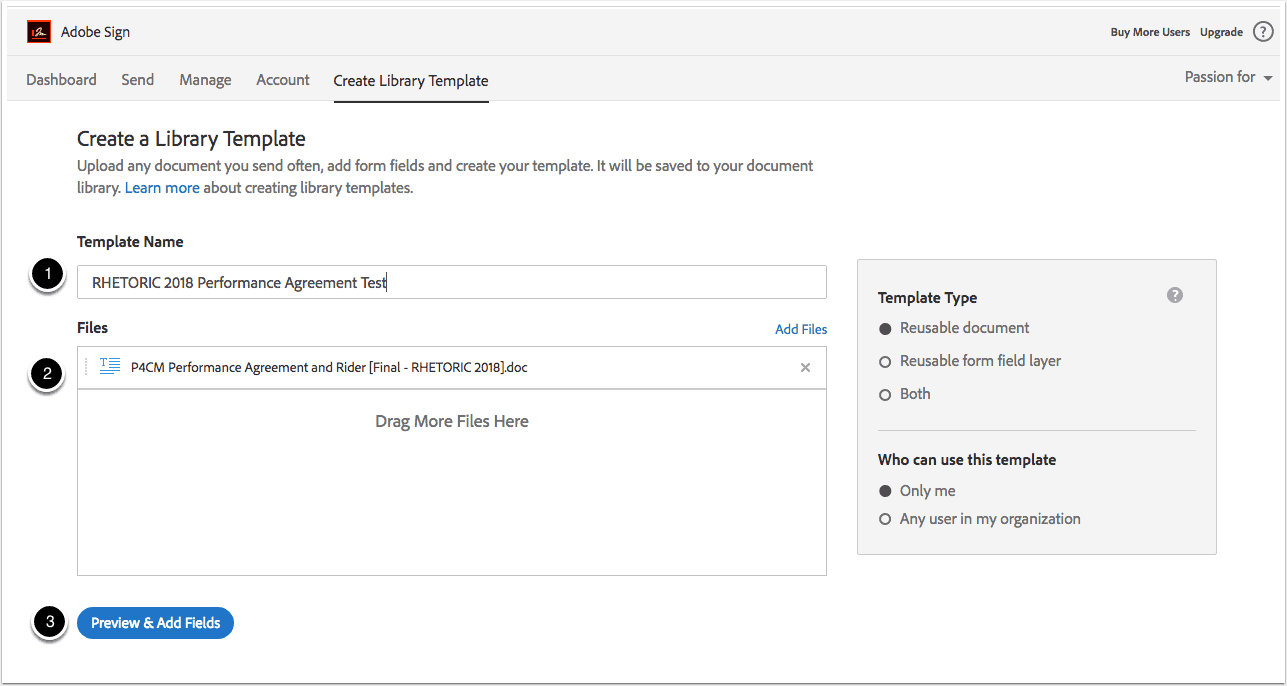
Name and upload base document
- Name the document template
- Drag and drop files that form the base of the document to be signed.
- Click Preview and Add Fields
Add the forms
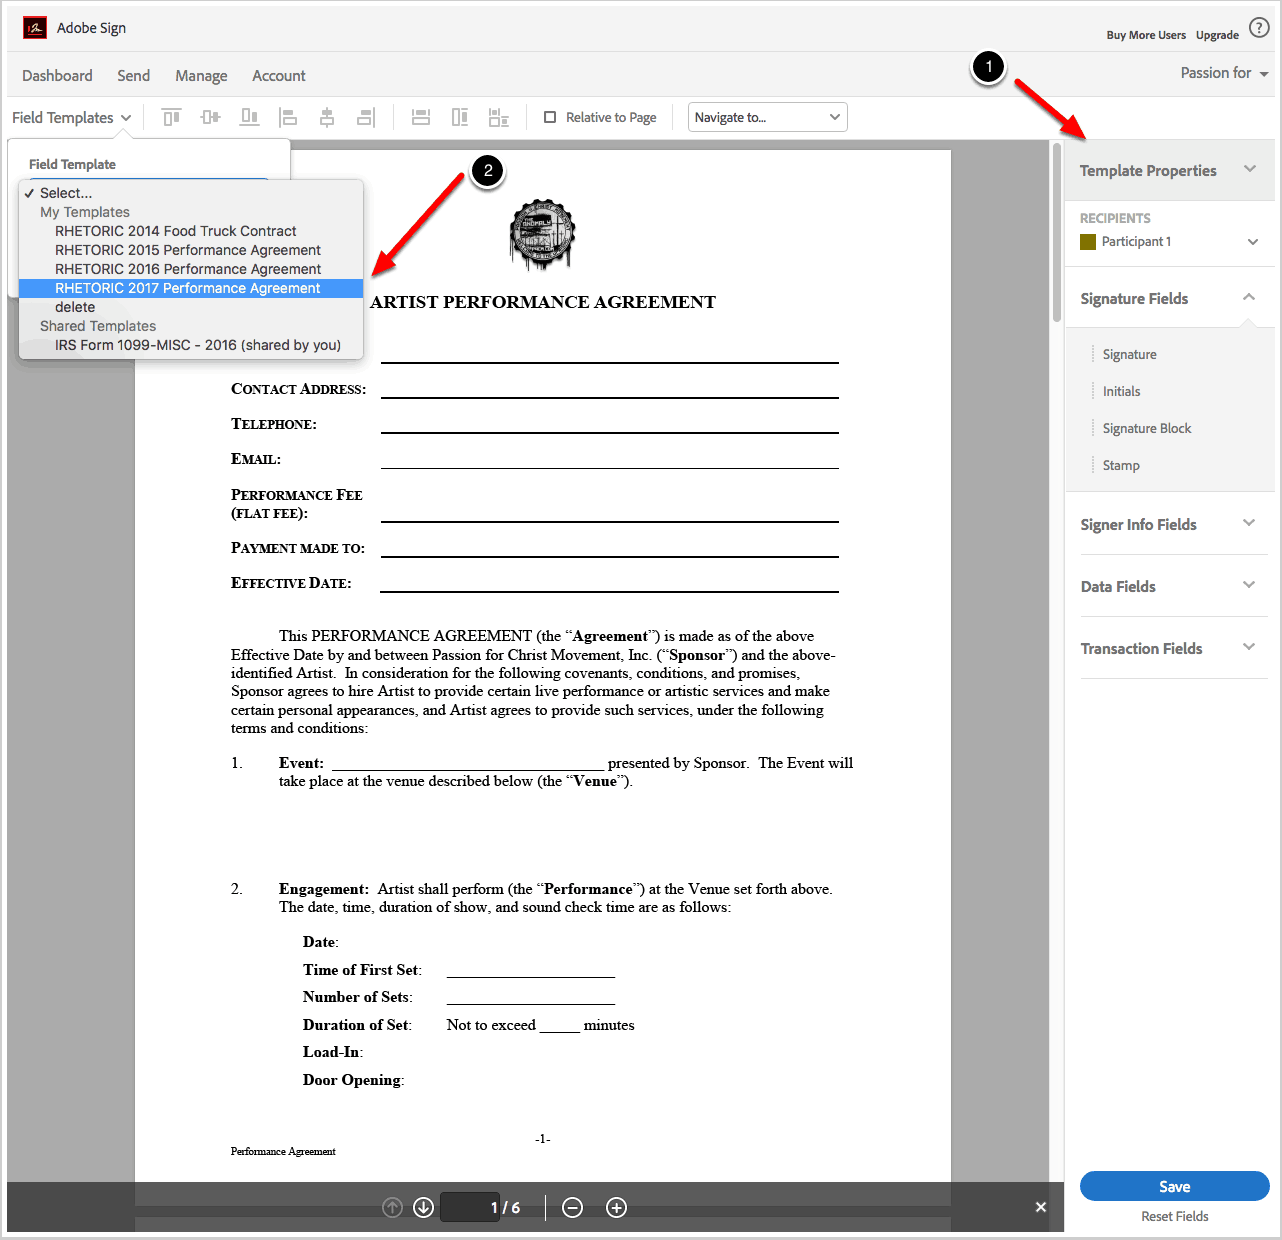
Figure out the right field types needed
This field is named “Artist Legal Name” and set for participant 1 to fill it out. Participant 1 or 2 is determined by the order of the emails you list when you send out the document.
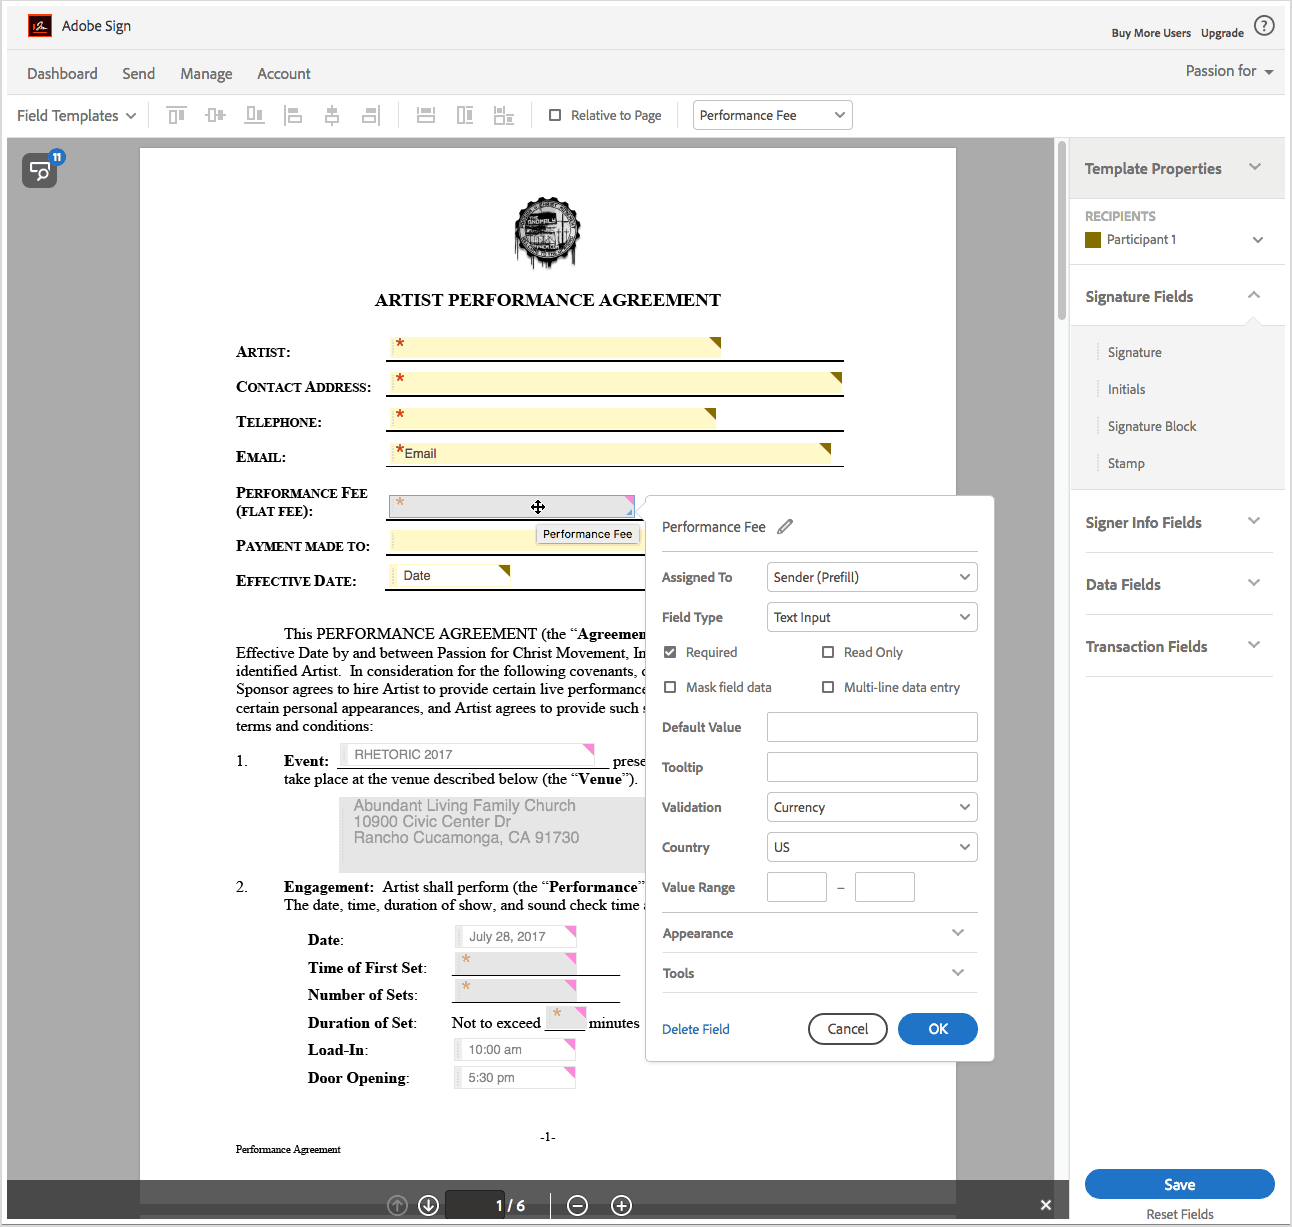
Field type: The field type is a text input.
Required or not: This field is required for the artist to fill out. Ensure you make any field you want filled required.
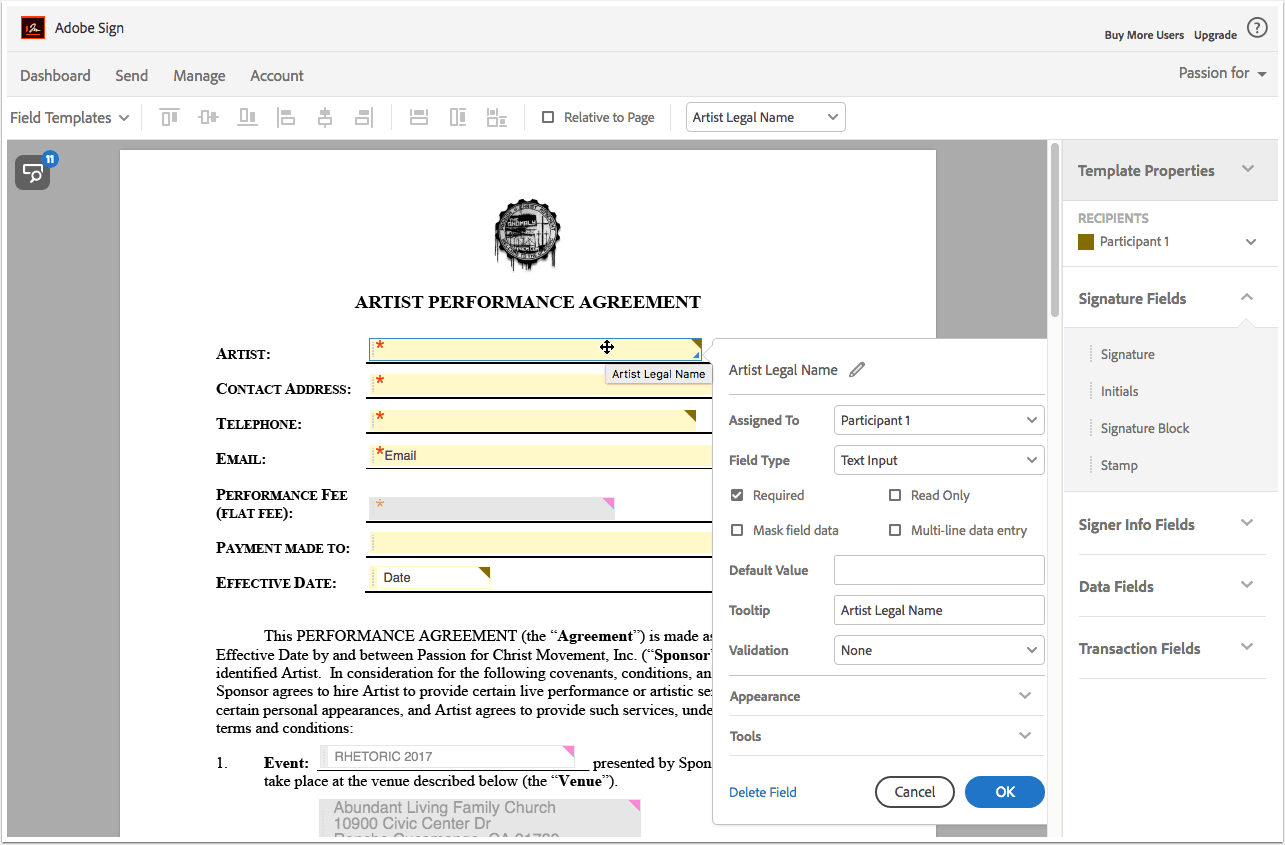
Use prefill fields
This form is prefilled by you the sender before it is sent to be signed. You can make it required as well.
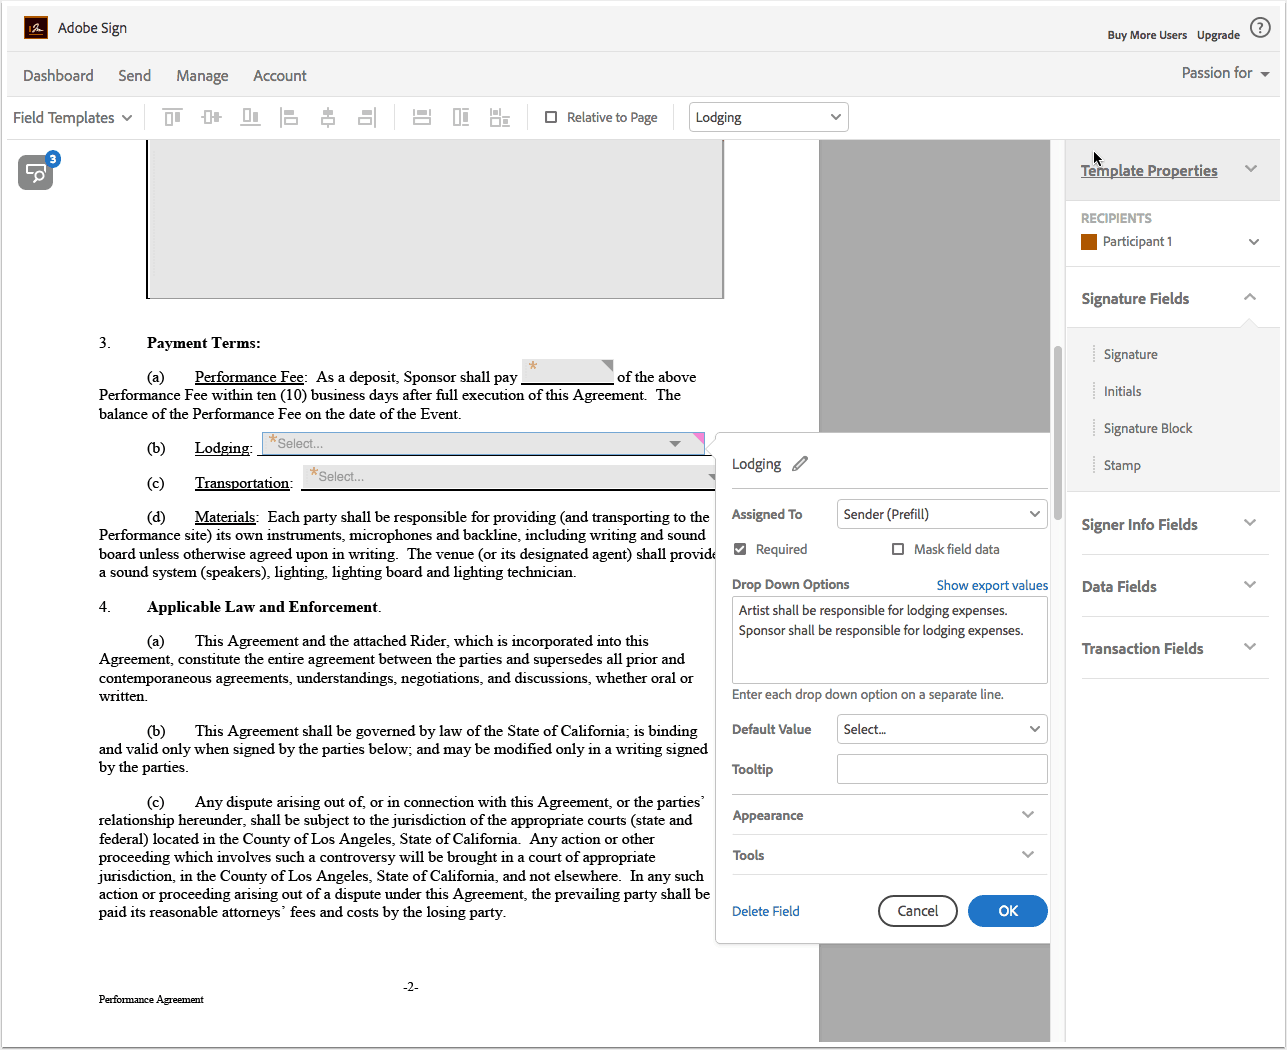
Use drop down option field
This field has options that differ for each artist situation so you don’t have to type the same thing repeatedly.
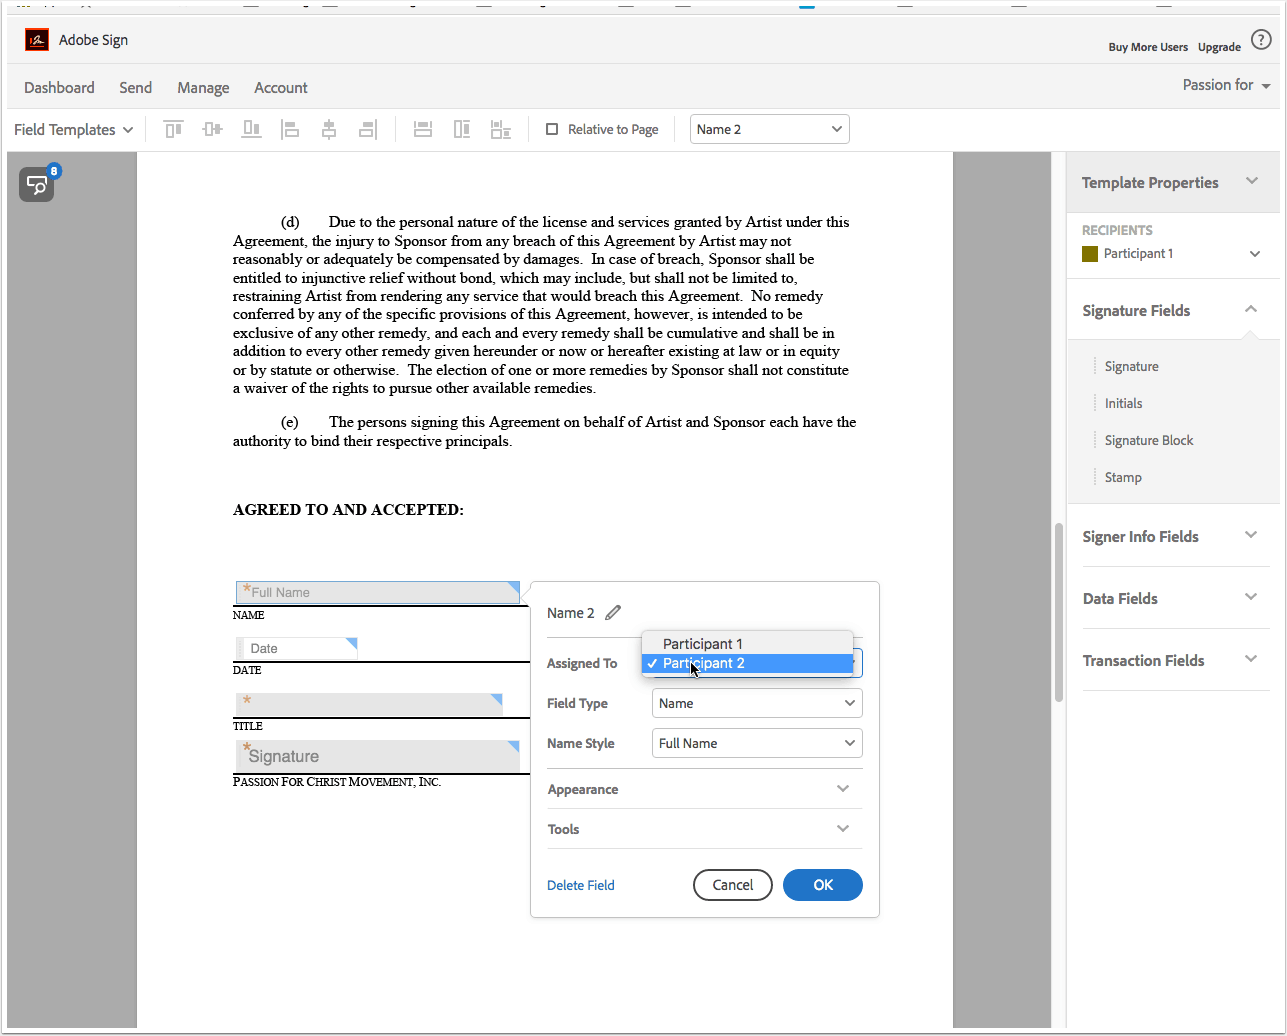
Which participant?
Make sure you’re clear about which participant is selected for each form field.
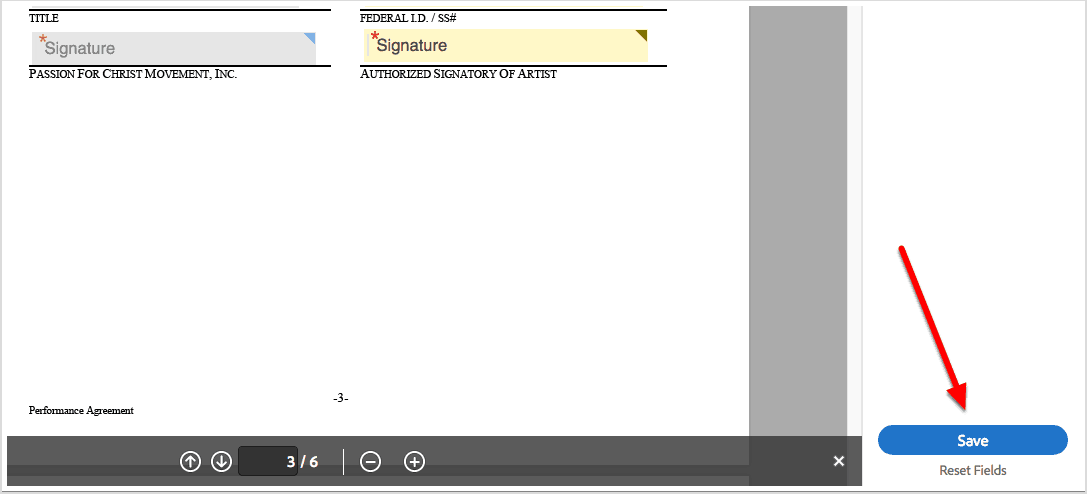
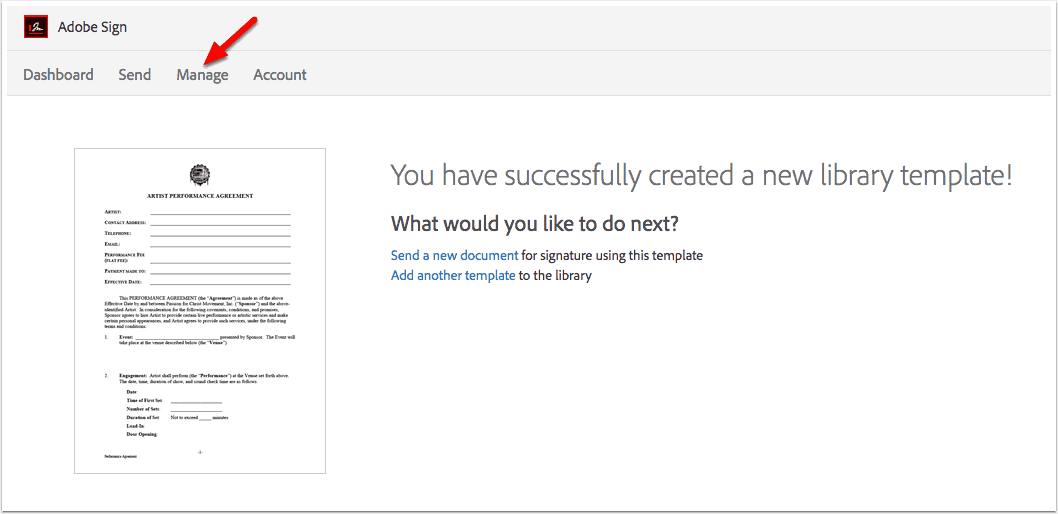
Save, test and use it
Once you’ve checked it all out, save the document and send it out as a test to make sure all is good.
Edit if there’s an issue
If anything isn’t working the right way, click on manage to find the template.
Scroll all the way down

Find your template and click edit to make the needed changes
Make the changes in the same manner listed above and test until you’ve got it right.

TQ Senkungu
Latest posts by TQ Senkungu (see all)
- Creating Podcast Episode - September 1, 2018
- Creating a Document Template for Signature - January 23, 2018
- Setting Up T-Shirt on WooCommerce and Printful - November 28, 2017